
Tags
baby bump, baby room, curtains, drapes, fabric, handmade, Home and Garden, home decor, interior design, nursery, pregnancy, sewing, sun fade, UV protectant, valence, window

I’ve been so looking forward to having my mom in town to help me put together the nursery, and especially excited for her mentorship in helping me learn how to use my new sewing machine! We spent weeks leading up to her visit planning out our project list and searching for fabrics, and finally the time has come to bring it all to life!
The first project on our sewing crusade was the valence. Once the room is complete, it will have a lot going on around the window. So for my valence, I didn’t want anything too dramatic or overly fancy. No swoops or ties and definitely no curtains or drapes. After sifting through several different styles online, I came across this one that I really liked. Box-style rod… just enough ruffle… simple and clean.  Using this image as our inspiration, we mapped out our patterns and measurements. Below is the finished product measurements. Remember to allow extra fabric for seam allowance. Also, the top layer is doubled over as it will wrap around the rod. We found that 3 yards were necessary to span the length of the 2 yard window in order to give it the amount of gather we were looking for.

Sidebar on Sun Fade!
I feel compelled to mention that one of my major concerns going into this was how to protect my project from sun fade. There’s no doubt that the sun fades material over time, and my colors are already on the pastel side as it is. Being that the valence will be right up against that window all day long, the last thing I want is for my hard work to look completely washed out by this time next year (and I should mention that half the fabrics I chose are being discontinued… so no chance of reproducing my projects later!) .
After extensive research and multiple conversations with bloggers, quilting masters and upholstery experts, I realized that this was a problem that the market is yet to find any sure solution… Blasphemy! But what I did decide to employ anyway, despite its very mixed reviews, was this UV fabric protectant spray:
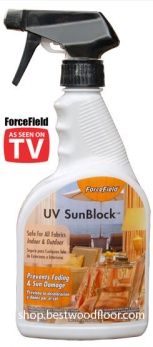
However gimmicky it may seem, I found that reputable fabric stores such as JoAnns and Hancocks stocked it, so I figured it was worth a shot. Needless to say, I took it home and sprayed the silly out of my valence. Stay tuned for my long term reviews on this product.
In addition to that, we took a more traditional route of sun-fade protection as well by simply adding a layer of white fabric to the back of the valence. The idea of course that this additional layer will help screen and deflect the direct light from my precious polka dots and stripes on the other side. If you do this, taking the time to piece the screen fabric to each seam individually will definitely make the end result nicer.

And just like that, my beautiful valence is complete! It was a little snug on the rod, so it took some extra careful shimmy and crimping to gather it all together (a lot like putting on pantyhose). Once mounted, it took just a a little adjustment and reworking of the bottom ruffle to get it to our liking.

I am SO pleased with the result!!


Next up, I will be cheering on my husband as he attempts the construction of the built-in bookcase bench that I designed to wrap around the window:

From there, the sewing crusade continues… fun pillows and cushions to accent the bench and compliment the valence!
See Operation Nursery for more details on the full plan and progress to date.
