• About Me
  • Categories
    • My Book Project
    • Tile Coasters
    • Things That Go
    • Dear Baby Bun
    • Dear Bundle
      • Dear AJ
    • Operation Nursery
    • Wood Burning
    • Paintings
    • Recipe Box
      • Recipe Blogs
    • The Things My Kids Say
    • My Wedding
    • Seasonal
      • Christmas
      • Autumn
      • Spring
    • Tips, Finds & Resources
  • My Store

Live Love Craft

~ by Leonie Marie

Live Love Craft

Monthly Archives: October 2013

Shading the Deer

31 Thursday Oct 2013

Posted by Leonie Marie in Wood Burning

≈ 2 Comments

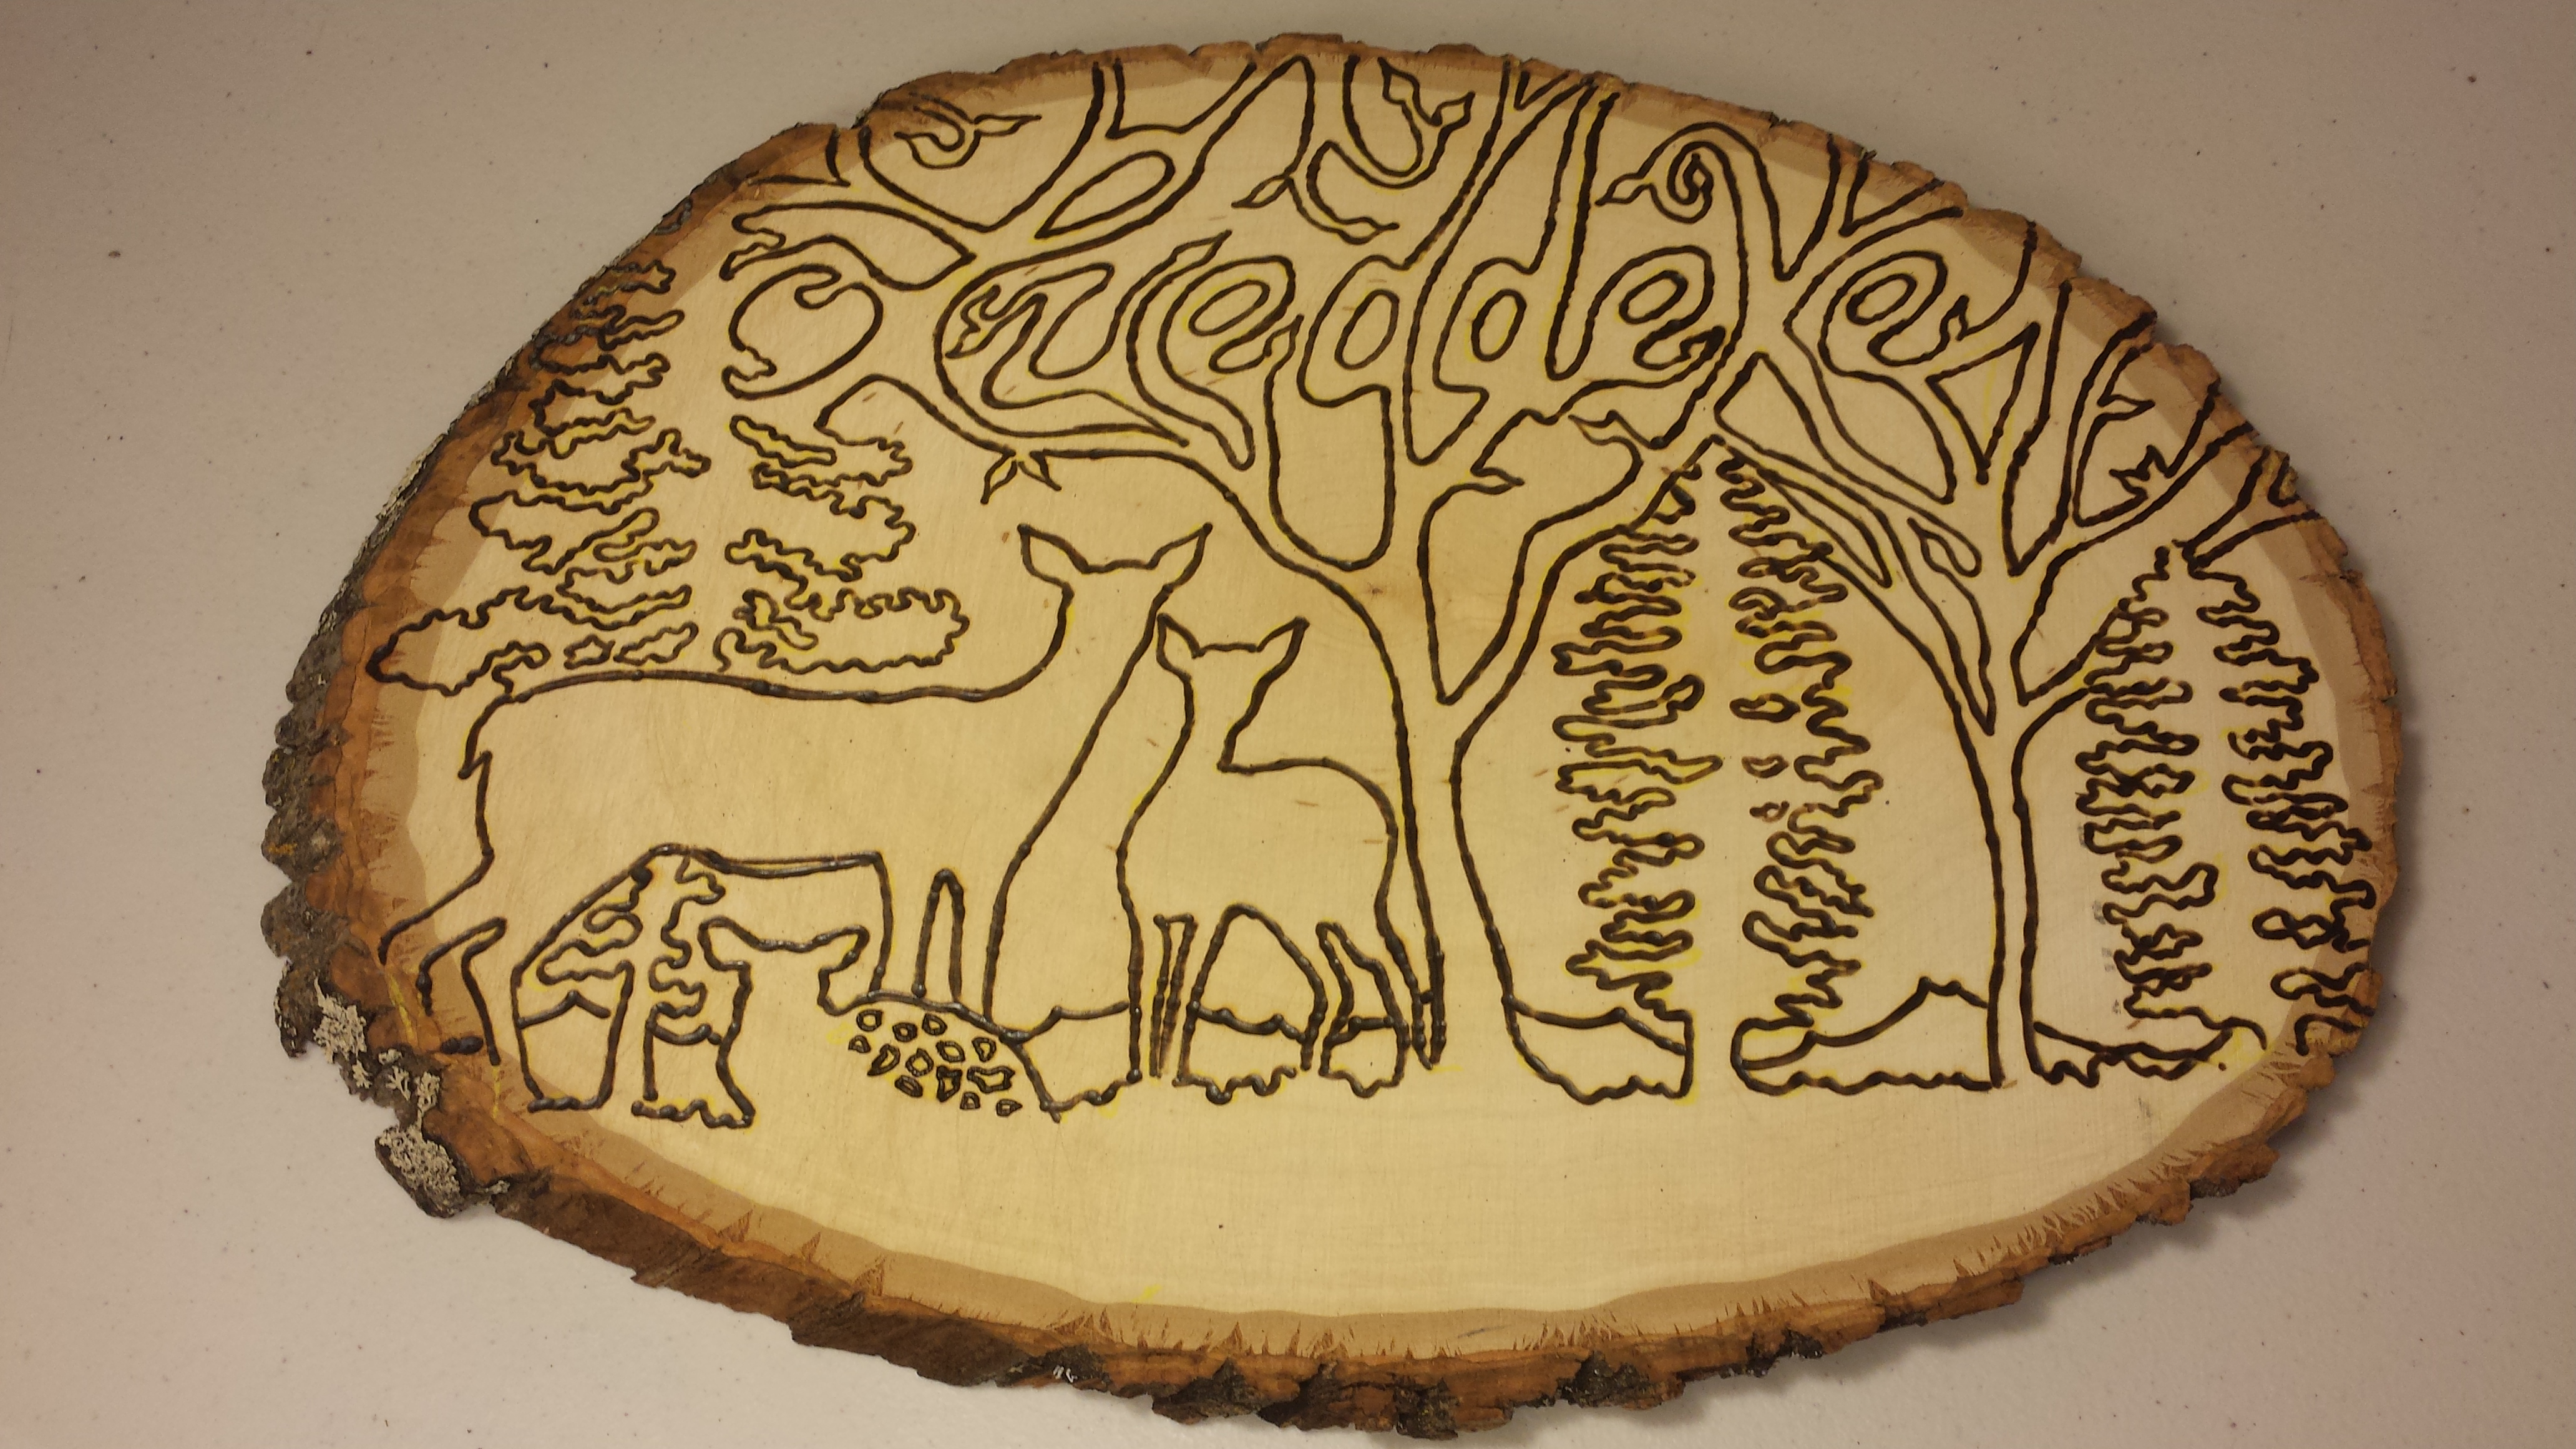
I am bumping up my timeline by a day, since we are celebrating Tony’s Birthday on Saturday. Which means I need to have this ready for varnish tomorrow in order to be dried in time for gift wrapping and delivery. This is a little on the ambitious side, but I think I will be in good shape.

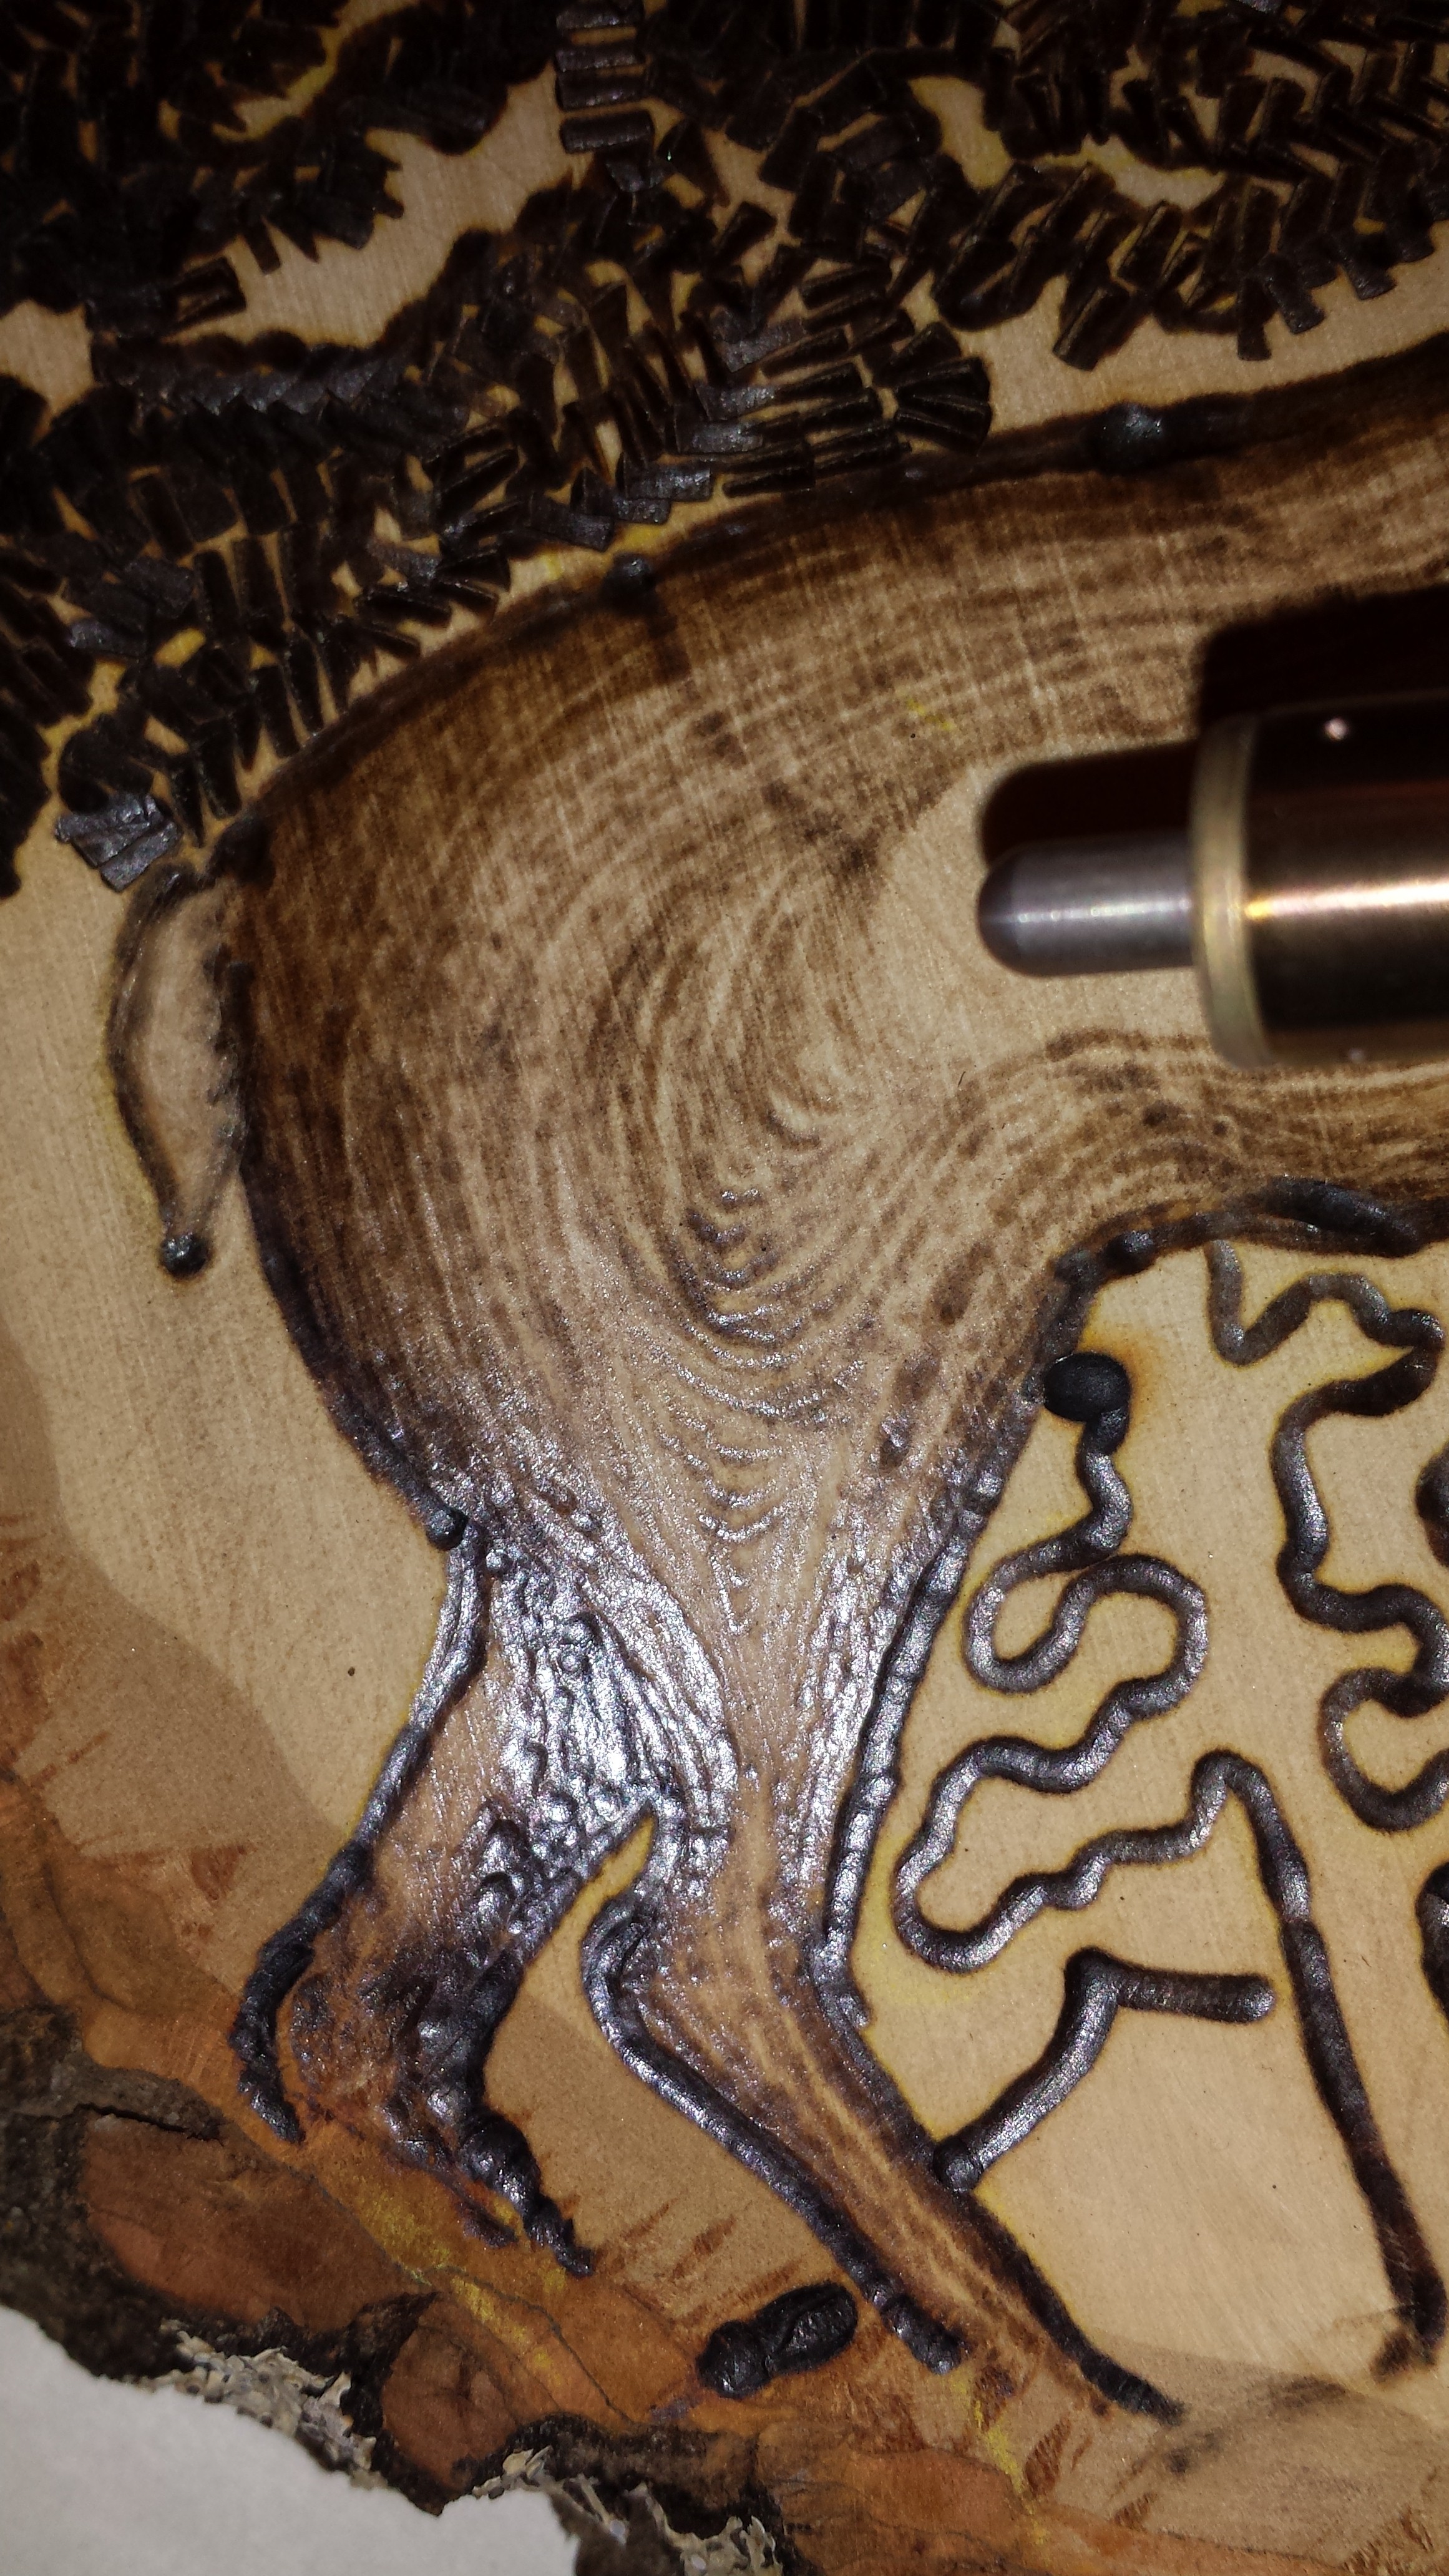
Ok so I’m ready to begin shading the deer. After trying multiple tips and techniques, I’ve come to the conclusion that none of them are ideal for shading wide surface areas. Using this standard rounded one was my best option, however, you can probably tell how challenging this is. By using varied pressures, I am having to create my shades by making single individual lines as close together as possible. The more the tip of the tool is picked up and put down, the more spotty it will appear.  So accuracy, a steady hand and a great deal of patience are required for this to even have a chance of looking good…

2013-10-30 18.47.50

Share this:

  • Twitter
  • Facebook

Like this:

Like Loading...

Creating Grass

30 Wednesday Oct 2013

Posted by Leonie Marie in Wood Burning

≈ Leave a comment

I’m back! And I’m getting a little stressed about the clock. I hope to be able to finish this up tomorrow so I have time to get a couple coats of varnish in before I give it to him.

It took me a while to figure out how I would go about the grass, but I think I got something here. I took some sand paper and did the best I could to erase the thick black line I burned to define the grass line. And instead I’m incorporating blades of grass.

To create dimension, make the blades bigger in the front of the picture (Or at the bottom of the frame), and smaller as they get further away (or toward the horizon line). This will give the illusion of depth.

2013-10-23 20.25.35

Share this:

  • Twitter
  • Facebook

Like this:

Like Loading...

Shading

24 Thursday Oct 2013

Posted by Leonie Marie in Wood Burning

≈ Leave a comment

I think I need to move on to another area for a while and come back to the pine tree scenario later…

I experimented with a tip that looks a lot like a calligraphy pen to shade the branches. It was difficult, but I taught myself another tip- SAND PAPER can help to lighten up the marks if they are not too deep! This helped a lot in creating the light shades.
image

Not really sure where to go next… I’m more than just a little intimidated to attempt shading the deer…

But I guess this is a good stopping point. I’m going to have to take a break from my project for a few days. I’m leaving for Chicago tomorrow and won’t be back until the 29th. That gives me 5 days to think about it and another 4 days to complete it. I’m hoping it comes together!

Share this:

  • Twitter
  • Facebook

Like this:

Like Loading...

Creating Textures… Bark & Pine Trees

23 Wednesday Oct 2013

Posted by Leonie Marie in Wood Burning

≈ Leave a comment

Quick Sidebar– Not only does my wood burning tool come with attachments for soldering, it also has a razor blade that heats up! It will cut right through hard foam and plastic materials like butter (Great for carving artificial pumpkins!)

Ok so thank you all for your polls on how to proceed with the foreground. I figured you weren’t going to let me take the easy way out! So I’m trying to figure out how to enhance the foreground with some details and textures (I figure if I really mess it up, I can always just color it all in later anyway!).

The bare branched trees seem like a good place to start, so I’m using a finer tip to create some bark. It’s easier to see already!

2013-10-15 17.02.57

I also spent some time experimenting on my practice piece of wood and developed this cool technique for the pine trees. It involves using a tip on the wood burner that resembles a flat-head screwdriver. By setting the temp to high, angling it and pushing it firmly into the wood, I was able to create the illusion of pine needles! I really like the way this effect looks.

2013-10-16 15.43.46

But I ran into a little issue here… Not sure if this pine tree should be in FRONT of the bare branched tree, or BEHIND it! …It looked different when it was just in outline form, when it kind of just “meshed” together… I’m afraid the pine tree is probably going to look a little funny and awkwardly inverted either way…

2013-10-16 15.47.39
2013-10-16 15.39.08
2013-10-16 15.33.22


Share this:

  • Twitter
  • Facebook

Like this:

Like Loading...

Using the Wood Burning Tool

22 Tuesday Oct 2013

Posted by Leonie Marie in Wood Burning

≈ Leave a comment

I spent the last couple hours practicing on a scrap piece of wood to get a feel for the tool and to practice different techniques before using it on my project.

I learned that for best results, keep the tool moving as steady as possible. The longer the tool touches the wood, the darker and deeper my markings will be. And I need to move more quickly for lighter lines and shading. The grain of the wood can be tricky too, making it difficult not to swerve off course of the line I am trying to follow.

Ok, enough practice! Time to use the tool on my project. I chose a larger tip to burn the outline of design into the wood. Here’s how it came out:

2013-10-15 15.47.42

I think I need to do something to create a distinctive foreground and background to really make it pop. The way I see it, my options are to either:

  • “color it in” to make everything in the foreground a solid dark color, OR
  • Try to create texture and details within the design itself.

I’m off to bed for now, but let me know your thoughts and I’ll pick it up again tomorrow!

Share this:

  • Twitter
  • Facebook

Like this:

Like Loading...

Transferring the Image

22 Tuesday Oct 2013

Posted by Leonie Marie in Wood Burning

≈ 2 Comments

I started by sanding the wood until it was nice and soft so I don’t have to worry about splinters.

Then, using transfer paper between my design and the wood, I traced firmly over the design with a pencil. This left a perfect blueprint of my image directly on wood.

2013-10-06 22.42.43My transfer paper actually had yellow carbon, of all colors, which did not show up the best on my wood, so that’s Lesson Learned #1… Be sure to use red, blue or black transfer paper…

Share this:

  • Twitter
  • Facebook

Like this:

Like Loading...

Getting Started!

21 Monday Oct 2013

Posted by Leonie Marie in Wood Burning

≈ 1 Comment

My Supply List:

  1. Wood Burning Tool
  2. TWO Cedar Planks (one for practice)
  3. Transfer Paper
  4. Sand Paper
  5. Pencil 
  6. Varnish (optional)

So my goal for this project is to successfully burn this design that I drew onto this plank of wood! It might be hard to make it out in this picture, but if you look closely, you will see 3 deer and our last name, Lueddeke, incorporated into the branches of the trees.

Woodburning1

I found this tool at Michael’s for $30. Mine came with several attachments for different wood burning techniques, but you can get a more basic one for cheaper. Mine even came with stuff to do soldering, which is pretty neat. 

20131021_180326

Share this:

  • Twitter
  • Facebook

Like this:

Like Loading...

Wood Burning- Tony’s Birthday Gift

21 Monday Oct 2013

Posted by Leonie Marie in Wood Burning

≈ Leave a comment

Welcome to my first ever craft blog project! Please bare with me as I learn how to best build my entries and become more efficient.

First, let me disclaim that I have NEVER used Wood Burning as a medium before. But I really wanted to make my husband something thoughtful, unique and challenging for his Birthday this year (Nov 3rd). So I will be broadcasting my first attempt at this, giving you a peek into my learning process. This is somewhat of a vulnerable undertaking, being that I have no idea if my project will even come out the way it’s intended to… But, here it goes anyway! Hopefully the result will be worthy enough to be a gift.

I intend to start this in the next day or two as I am cutting it close on time to complete, so feel free to follow me if you are interested in the real-time work in progress. Should be interesting…

.

Share this:

  • Twitter
  • Facebook

Like this:

Like Loading...

Having some fun with this season’s Autumn accents

20 Sunday Oct 2013

Posted by Leonie Marie in Autumn, Seasonal

≈ Leave a comment

Tags

Autumn, dining, Fall, home, home decor, interior design, lighting, table, thanksgiving


.

Share this:

  • Twitter
  • Facebook

Like this:

Like Loading...

Custom Tile Coasters

Featured

Posted by Leonie Marie in Tile Coasters

≈ Leave a comment

Tags

Coaster, Craft, custom, DIY, Etsy, handmade, modpodge, Paper, Shopping, Tile

Mod Podge Tile Coasters! I make these and sell them on my Etsy store. Here are a few examples, however you can visit my shop to see more.

https://www.etsy.com/shop/LeonieMarieCrafts

Remember I do custom work, and all projects are made to order, so if you have a design or idea in mind, I can create it for you!


Share this:

  • Twitter
  • Facebook

Like this:

Like Loading...
← Older posts

Leonie Marie

Leonie Marie

Leonie Marie

So many fun projects to get into!

Personal Links

  • Leonie Marie Crafts - Etsy Store
  • Live Love Craft

View Full Profile →

Enter your email address to follow this blog and receive notifications of new posts by email.

Join 285 other subscribers

My Book Project

Goal to begin submission processDecember 31, 2017
My goal is to begin the submission process of "My Little Wishing Star" to publishers by the end of this year.

Archives

  • August 2018
  • March 2018
  • January 2018
  • October 2017
  • September 2017
  • July 2017
  • November 2016
  • June 2016
  • May 2016
  • April 2016
  • March 2016
  • February 2016
  • November 2015
  • August 2015
  • November 2014
  • August 2014
  • July 2014
  • June 2014
  • May 2014
  • April 2014
  • March 2014
  • February 2014
  • January 2014
  • December 2013
  • November 2013
  • October 2013

Comments on my work

Leonie Marie on Things That Go. 6 of 6
ilaria101 on Things That Go. 6 of 6
Leonie Marie on Welcome Wesley
Anonymous on Welcome Wesley
Leonie Marie on Welcome Wesley

Blog at WordPress.com.

Privacy & Cookies: This site uses cookies. By continuing to use this website, you agree to their use.
To find out more, including how to control cookies, see here: Cookie Policy
  • Follow Following
    • Live Love Craft
    • Join 109 other followers
    • Already have a WordPress.com account? Log in now.
    • Live Love Craft
    • Customize
    • Follow Following
    • Sign up
    • Log in
    • Report this content
    • View site in Reader
    • Manage subscriptions
    • Collapse this bar
 

Loading Comments...
 

    %d bloggers like this: