
Quick Sidebar– Not only does my wood burning tool come with attachments for soldering, it also has a razor blade that heats up! It will cut right through hard foam and plastic materials like butter (Great for carving artificial pumpkins!)
Ok so thank you all for your polls on how to proceed with the foreground. I figured you weren’t going to let me take the easy way out! So I’m trying to figure out how to enhance the foreground with some details and textures (I figure if I really mess it up, I can always just color it all in later anyway!).
The bare branched trees seem like a good place to start, so I’m using a finer tip to create some bark. It’s easier to see already!

I also spent some time experimenting on my practice piece of wood and developed this cool technique for the pine trees. It involves using a tip on the wood burner that resembles a flat-head screwdriver. By setting the temp to high, angling it and pushing it firmly into the wood, I was able to create the illusion of pine needles! I really like the way this effect looks.
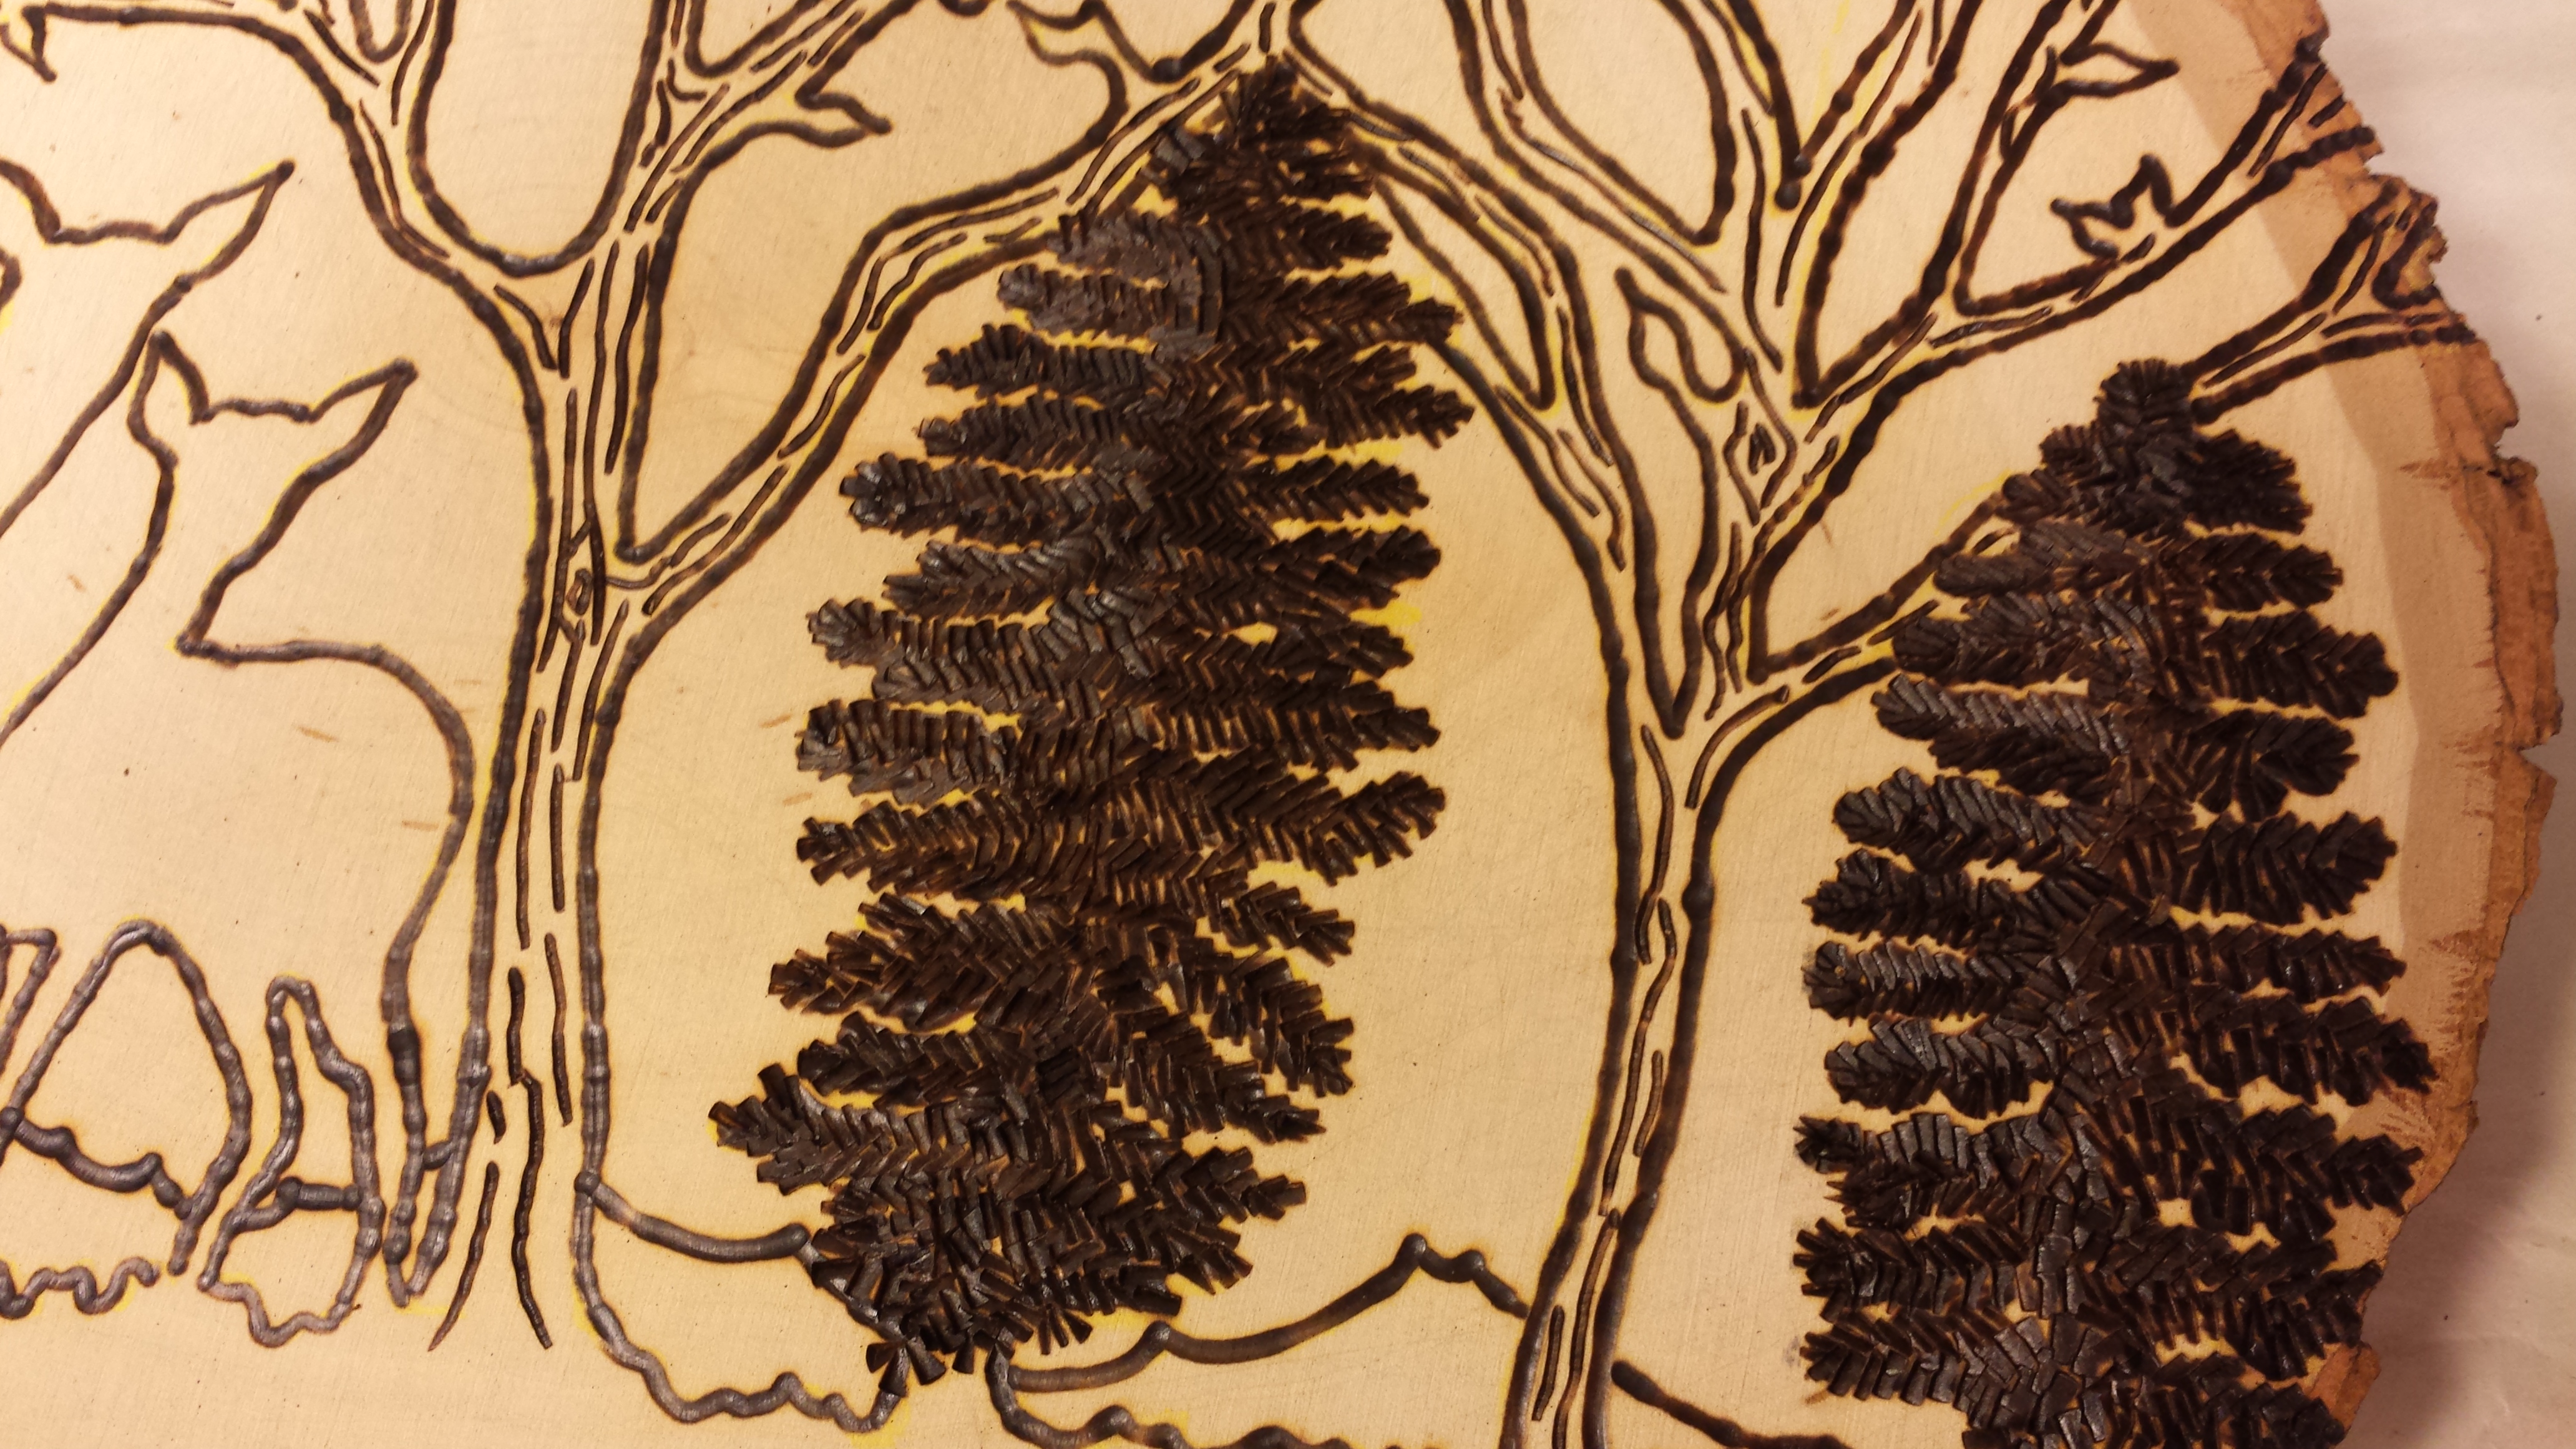
But I ran into a little issue here… Not sure if this pine tree should be in FRONT of the bare branched tree, or BEHIND it! …It looked different when it was just in outline form, when it kind of just “meshed” together… I’m afraid the pine tree is probably going to look a little funny and awkwardly inverted either way…


